
How to Diagnose and Fix Google Maps Ranking Drops
Managing a Google Business Profile (GBP) that is suddenly not driving the leads or traffic it once did can be stressful. A loss of ranking in Google Maps can feel mysterious, but visibility drops usually have identifiable triggers. With the right sequence of analysis and fixes, you can recover.
Step 1: Confirm and Quantify the Ranking Drop
Review your Google Maps performance metrics in Google Business Profile Insights
You can obviously identify a ranking drop by comparing ranking grids over time, but the first true sign of a ranking drop that’s causing a real-world issue is a decrease in calls coming from the business profile. You’ll need to review your call data to see if calls coming from the business profile are down month-over-month AND year-over-year (important for seasonality). If you do not have dedicated call tracking for your business listing (which you ABSOLUTELY should), you can use the call data in the Google Business Profile Insights tab as a directional dataset. Insights only show calls made from mobile devices and are based on just tapping on the button, versus a placed call, so you are not seeing “true” call data if you rely on Insights only.

However, if you must rely on Insights, also check if search impressions and clicks are down, and direction requests (if those matter to your business). To see year-over-year data, you need to exclude the current month from the date range.

Check Google Analytics and Google Search Console
Google Analytics will have better click data than GBP insights, so make sure to review your GA4 data. However, to segment only GBP traffic out in GA4, you’ll need to already be using UTM codes on your GBP links. If you notice clicks to the website are down from GBP, this is another sign that rankings may have dropped.
Pro tip: Filter for GBP users only with a filter that contains your specific UTMs (for example: “first user campaign” contains “gbpwebsite”, or however you have the UTM parameter for campaign set up).
Then, using Google Search Console, identify what specific keywords show the biggest drop in clicks from your GBP URL. Ignore impressions because these are heavily skewed by rank trackers. You’ll want to do so by navigating over to the “Search results report, under the Performance Section. Next, add a ‘page’ filter, where the logic is ‘URLs containing’ = ‘utm’.
Jot down or export the keywords you have seen the biggest drop in clicks for, specific to the GBP.
Check ranking and visibility shifts with local tracking tools
Use a geo grid rank tracking tool, such as GeoRank in Moz Local, to check your map pack visibility and shifts to your key revenue-driving keywords. This is where ongoing local rank tracking becomes super important!

Pro tip: Set up your local rank tracking reports to scan regularly. This can be either monthly or weekly, depending on the need. Ensure the reports are set to run on the same days, and at the same time of day. (eg, weekly, on Tuesdays, at noon).
Check which keywords have lost visibility, and whether the loss affects all keywords or only some. For example, let’s say you are an HVAC company in Tampa, that provides multiple services. You should check to see if:
- Did all keywords lose visibility?
- Or, was it just a subset of keywords that lost visibility, like your “plumbing” keywords?
- (e.g., plumber, best plumber, plumber near me)
- Or, was it just all your geo-modified keywords that lost visibility across all lines of business
- (e.g., Tampa plumber, Tampa HVAC, Tampa AC repair)
Take note of the timing of the drop. Was it sudden? Were you ranking last week, but not this week? Or was it a gradual decline over months?
Note the timeline
Mark the date the drop was first started. Overlay internal changes, such as listing edits or website updates, and external events, such as algorithm updates or changes to the Google results layout. This will help isolate the cause later. You can add annotations to Google Search Console or GA4.
Step 2: Classify the Type of Ranking Drop
Ranking loss
You are still visible in Google Maps, but just in noticeably lower ranking positions. You may have dropped out of the top three map pack, which can account for serious traffic loss. Dropping out of the map pack can indicate a number of causes, such as competitor shifts, category problems, or weakened ranking signals, such as fewer reviews.
Check if competitors have also lost rankings or if the issue is isolated to your profile. If several businesses drop at the same time, it may be a local algorithm update. If only your listing is affected, then it points to a problem specific to your own profile.
For example, the first ranking grid here shows a Moz Local GeoRank by Competitor report, where a business and two other listings are competing for the top three spots. Fast-forward a month, and the second ranking grid shows the business has dropped from position 3 to 9, while the other 2 listings stayed in the map pack (top 3). So the business we are tracking lost rankings, while all the competitors stayed more or less the same. This indicates a likely isolated ranking signal issue on the listing that saw the decline, rather than an algo update.

Filtered or suppressed listing
Your listing disappears entirely from Maps for your top keywords, or appears only some of the time, creating a pattern of inconsistent visibility. This often indicates that Google’s local filter is impacting your listing, possibly due to duplicate listings or a competitor that is too close to your listing.
Check for conflicting listings at the same or a nearby address, within 200 ft of your business listing pin. If you see a “Swiss cheese” pattern on a ranking report, where you are ranking for some pins but completely missing from the rankings for other pins, check whether a nearby competitor has the opposite pattern on their report (i.e. they are ranking for the pins you are not).
Suspension or disabled profile
If your profile shows it’s suspended, not visible to the public, or changes cannot be published, you may experience ranking drops.
If your profile is suspended, it falls into one of two categories:
- Soft suspension: still visible to the public, but reverification is needed to make changes
- Hard suspension: profile is removed completely from Maps, and you have zero visibility.
Both types of suspensions require a reinstatement process, which is most likely video re-verification. Only a hard suspension would cause your rankings to drop, as with soft suspension, your profile is still on maps and should not lose any rankings.
Traffic or call drop despite stable rankings
If your ranking position has not changed, but calls, clicks, and direction requests have dropped, the cause may be tracking issues, website problems, changes in the Google results layout, or changes in user intent. First, investigate your measurement setup to make sure it’s not a simple tracking issue.
Then, compare before-and-after screenshots of the search results for your top keywords. Recently, in mobile search results, I’ve seen a trend where the local pack is being replaced by an AI Overview, and that AI Overview is showing local businesses. Seer Interactive did a study that shows the presence of an AIO in the search result significantly reduces CTR for everything showing in the SERP (including Ads!).
The Power of SEO Consultancy in Multan
In the bustling, historic city of Multan, where ancient traditions meet modern commerce, businesses are increasingly recognizing the undeniable power of online visibility. In a world dominated by search engines like Google, simply having a website is no longer enough. To thrive, businesses need to be found – and that’s where SEO consultancy in Multan steps in as a critical catalyst for growth.
Search Engine Optimization (SEO) is the art and science of improving your website’s visibility on search engine results pages (SERPs). It’s about ensuring that when potential customers in Multan (or beyond) search for products or services you offer, your business appears at the top of their results, driving organic (unpaid) traffic to your site.
Why Multan Businesses Need SEO Consultancy
The local market dynamics and competitive landscape in Multan make SEO consultancy particularly valuable:
- Dominating Local Searches: Multan is a city with distinct localities, markets, and communities. For businesses like restaurants, retail stores, local service providers, and medical clinics, Local SEO is paramount. An SEO consultant helps optimize your Google Business Profile, implement local keywords, and build local citations so that when someone searches for “best Biryani in Multan” or “plumber near me Multan,” your business is the first they see.
- Reaching a Broader Audience: While local presence is crucial, many Multani businesses, especially those in handicrafts (like blue pottery), agriculture (mangoes, cotton), or e-commerce, aim for national and even international reach. SEO consultancy helps them tap into broader markets by optimizing for relevant keywords, building domain authority, and implementing strategies that transcend geographical boundaries.
- Outmaneuvering Competition: The digital space in Multan is becoming increasingly crowded. Businesses that invest in professional SEO gain a significant competitive edge. An SEO consultant analyzes competitor strategies, identifies untapped opportunities, and develops a roadmap to outrank rivals in search results.
- Cost-Effective Marketing: Compared to traditional advertising methods, SEO offers a higher return on investment (ROI) in the long run. While it requires an upfront investment and consistent effort, the traffic generated is organic and free, leading to sustainable growth without continuous ad spend.
- Building Brand Credibility and Trust: Appearing high on Google’s search results inherently builds trust and credibility. Users perceive businesses ranked highly as more authoritative and reliable. An SEO consultant helps achieve this by focusing on technical SEO, high-quality content, and strong backlink profiles.
- Understanding Consumer Behavior: SEO isn’t just about rankings; it’s about understanding what your target audience is searching for. SEO consultants perform in-depth keyword research, providing valuable insights into consumer intent and helping businesses tailor their offerings and content accordingly.
What to Expect from an SEO Consultancy in Multan
A reputable SEO consultancy in Multan will typically offer a comprehensive suite of services, tailored to the specific needs of your business:
- Website Audit: A thorough analysis of your current website to identify technical issues, on-page optimization opportunities, and overall performance bottlenecks.
- Keyword Research and Strategy: Identifying the most relevant and high-volume keywords that your target audience is using, both locally and nationally/globally.
- On-Page SEO Optimization: Optimizing website content, meta titles, descriptions, headings, images, and internal linking structure to make them search engine friendly.
- Off-Page SEO (Link Building): Developing strategies to acquire high-quality backlinks from authoritative websites, enhancing your site’s credibility.
- Technical SEO: Addressing behind-the-scenes factors like website speed, mobile responsiveness, sitemaps, crawlability, and schema markup to ensure search engines can effectively index and rank your site.
- Content Marketing Strategy: Guiding the creation of valuable, engaging, and SEO-optimized content (blogs, articles, product descriptions) that attracts and retains your audience.
- Local SEO Optimization: Focusing on Google Business Profile optimization, local citation building, and geographic targeting.
- Performance Tracking and Reporting: Providing regular, transparent reports on key metrics like rankings, organic traffic, conversions, and ROI, along with ongoing recommendations.
- Competitor Analysis: Deep-diving into your competitors’ SEO strategies to identify their strengths and weaknesses and build a stronger counter-strategy.
Choosing the Right SEO Consultant in Multan
When selecting an SEO consultant or agency in Multan, consider these factors:
- Proven Track Record: Look for case studies, testimonials, and verifiable results from past clients, especially those in similar industries.
- Understanding of Local Market: A consultant familiar with Multan’s specific economic landscape and consumer behavior will be more effective.
- Transparency and Communication: Ensure they provide clear explanations of their strategies, regular updates, and are accessible for questions.
- Ethical Practices: Choose a consultant who adheres to “white-hat” SEO techniques, avoiding shortcuts that could lead to penalties from search engines.
- Customized Strategies: Avoid one-size-fits-all approaches. A good consultant will develop a strategy unique to your business goals.
In an increasingly digital world, businesses in Multan can no longer afford to be invisible online. By partnering with a skilled SEO consultancy, they can unlock their full digital potential, attract more customers, and achieve sustainable growth in the vibrant market of the “City of Saints.”
Finding the Best SEO Services in Islamabad
In the bustling capital of Islamabad, where businesses are rapidly embracing the digital age, a strong online presence is no longer a luxury – it’s a necessity. Search Engine Optimization (SEO) stands at the forefront of this digital transformation, serving as the invisible force that connects businesses with their target audience online. But with a myriad of agencies and consultants offering “best SEO services in Islamabad,” how do you identify the right partner to truly elevate your digital game?
Why SEO is Paramount for Islamabad Businesses
Islamabad’s vibrant economy and growing digital adoption mean that competition for online visibility is fierce. Whether you’re a local boutique, a budding tech startup, a healthcare provider, or an e-commerce venture, your potential customers are turning to search engines like Google for their needs.
Effective SEO ensures:
- Increased Organic Traffic: More people finding your website naturally, without paid ads.
- Higher Search Rankings: Appearing at the top of search results, where most clicks happen.
- Enhanced Brand Visibility & Credibility: Building trust and authority in your industry.
- Targeted Lead Generation: Attracting visitors who are actively looking for your products or services.
- Improved ROI: A cost-effective long-term marketing strategy compared to constant advertising.
What Defines the “Best” SEO Services in Islamabad?
The “best” SEO services aren’t just about achieving top rankings; they’re about delivering sustainable growth and a measurable return on investment. Here’s what to look for:
1. Proven Track Record and Case Studies: A reputable SEO agency or consultant will have a portfolio of successful projects and quantifiable results. Look for case studies that demonstrate significant increases in organic traffic, keyword rankings, and conversions for their past clients, especially those in similar industries.
2. White-Hat SEO Practices: The digital landscape is constantly evolving, and Google’s algorithms are smarter than ever. The best SEO services in Islamabad strictly adhere to ethical, “white-hat” SEO techniques. This means avoiding spammy tactics that might yield short-term gains but can lead to severe penalties from search engines down the line. Focus on agencies that prioritize quality content, technical optimization, and genuine link building.
3. Deep Understanding of Local SEO: For businesses targeting the Islamabad market, local SEO is crucial. The best providers will demonstrate expertise in optimizing Google Business Profiles, utilizing location-specific keywords, managing local citations, and developing content that resonates with the local audience. In 2025, localized search with hyper-personalization is a major trend in Pakistan, making this even more vital.
4. Comprehensive Service Offering: SEO is a multi-faceted discipline. A truly effective SEO partner will offer a holistic approach, encompassing:
- In-depth Keyword Research: Identifying high-value keywords relevant to your business and target audience.
- On-Page SEO: Optimizing website content, meta descriptions, headings, and internal linking.
- Technical SEO: Ensuring website crawlability, mobile-friendliness, site speed, and structured data implementation (especially important with AI-driven search trends in 2025).
- Off-Page SEO (Link Building): Acquiring high-quality backlinks from authoritative websites.
- Content Strategy & Creation: Developing valuable, engaging content that addresses user intent.
- Regular Reporting and Transparency: Providing clear, actionable reports on progress, traffic, rankings, and ROI.
5. Adaptability to Latest SEO Trends (2025 and Beyond): The SEO landscape is dynamic. The best SEO services in Islamabad will be abreast of the latest trends, including:
- AI-Driven SEO: Leveraging AI tools for analysis and automation, while maintaining human expertise.
- Voice Search Optimization: Adapting content for conversational queries.
- Video Content Optimization: Utilizing platforms like YouTube and Instagram Reels, as video increasingly dominates organic clicks in Pakistan.
- E-E-A-T (Experience, Expertise, Authoritativeness, Trustworthiness): Crafting content that demonstrates clear expertise and builds trust with both users and search engines.
- Mobile-First Indexing: Ensuring websites are optimized for mobile performance, given the high mobile internet usage in Pakistan.
6. Excellent Communication and Client Support: Effective collaboration is key. Choose an agency that prioritizes open communication, provides regular updates, and is readily available to answer your questions and discuss strategy.
How to Choose Your Ideal SEO Partner in Islamabad:
- Define Your Goals: Clearly outline what you want to achieve with SEO (e.g., more leads, higher sales, increased brand awareness).
- Research Thoroughly: Look for agencies with positive reviews, strong online presence, and a good reputation.
- Request Case Studies & Testimonials: Verify their past successes and client satisfaction.
- Ask About Their Strategy: A good agency will explain their approach, tailored to your specific business needs.
- Discuss Pricing and Packages: Understand what’s included in their services and ensure it aligns with your budget. Be wary of unusually cheap offers, which often indicate low-quality or unethical practices.
- Assess Their Adaptability: Inquire about how they stay updated with Google algorithm changes and emerging trends.
Conclusion
Investing in the right SEO services in Islamabad is an investment in your business’s future. By prioritizing ethical practices, a comprehensive approach, a deep understanding of local market dynamics, and a commitment to staying ahead of evolving trends, you can find a partner that not only gets your business found online but also drives sustainable growth and success in the competitive digital realm of Islamabad.
How to use AI in WordPress
Numerous AI solutions are now available to streamline various tasks of website management, allowing users of all skill levels to optimize their websites and content effortlessly. And while there are plenty of ways to integrate AI into your website’s control panel, WordPress simplifies the process with plugins.
These AI plugins can improve your site with new functions, like chatbots for customer support, personalized content for SEO and user engagement, and image optimization.
This WordPress tutorial will explore eleven different ways you can use AI on your WordPress site. We will also discuss the benefits of incorporating them into your workflow.
11 ways to use AI in WordPress
This section explores common use cases where AI tools come in handy.
1. Build a website
Building a new WordPress website doesn’t require coding, but designing and adding content can still take time.
Hostinger addresses this challenge by integrating AI into the site-building process. Our AI Website Builder for WordPress, available on Managed WordPress Business and Cloud hosting plans, can help you build a website in just minutes based on your description.
The AI tool is currently optimized for building business and portfolio websites. Here’s how it works:
- Purchase any Hostinger hosting plan that includes AI Website Builder for WordPress, then follow the onboarding flow.
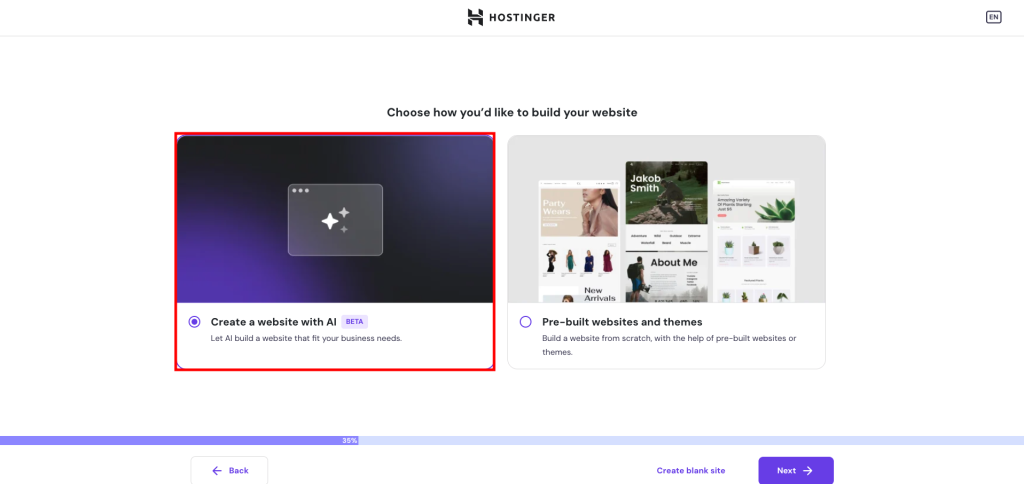
- Choose Portfolio or Business and services as the type of website you want to build.

- Select Create a website with AI as your preferred method.
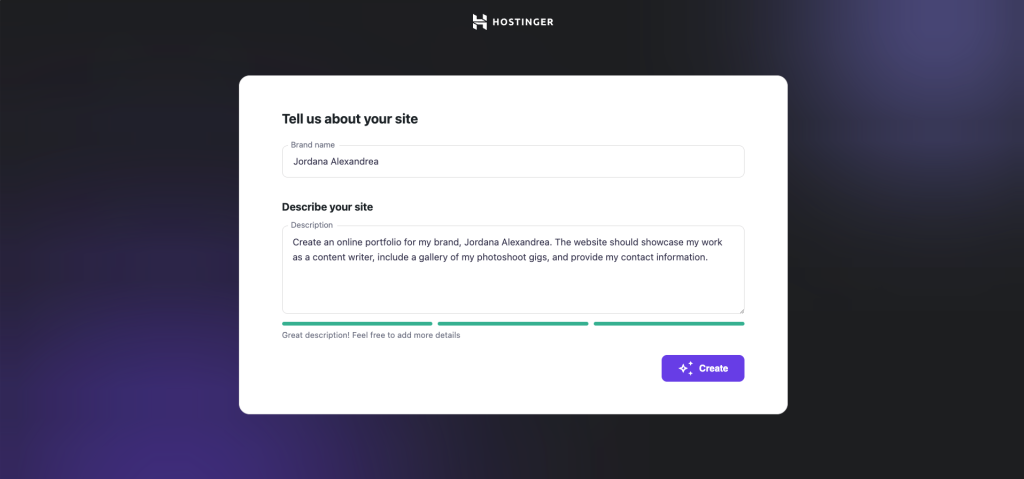
- Follow the rest of the onboarding process until you see the AI website creation form. Fill in your brand name and a brief description of the kind of website you want to build. Once you’re done, click Create. The process takes a minute or two to complete.
- Review the newly created website, and click Confirm and edit if you’re happy with it. Otherwise, redo the prompt by selecting Create again.
Congratulations, you’ve built your WordPress site! The tool will redirect you to the WordPress editor, where you can make final adjustments to the design and copy.

2. Create copy text and content
A regular publishing schedule is a key practice in search engine optimization (SEO). However, not all website owners can dedicate the time and resources it requires.
AI tools address this issue by simplifying the content creation process so that you do not have to spend hours doing research and writing text.
AI content creators use Natural Language Processing (NLP) to understand human language and tailor content based on your prompts. They can create website content quickly and optimize it with relevant keywords for SEO. Certain AI tools even allow for translation into multiple languages, expanding your audience reach.
Hostinger clients on any hosting plan have access to our in-house AI Content Creator plugin. Here’s how to use it:
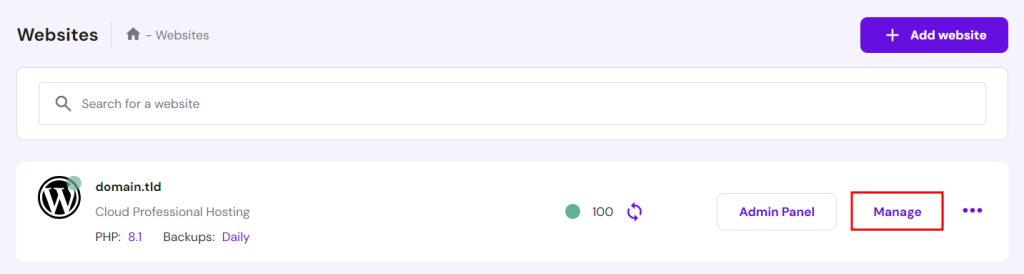
- Navigate to the Websites section on hPanel. Click Manage next to the WordPress website you want to improve with AI.
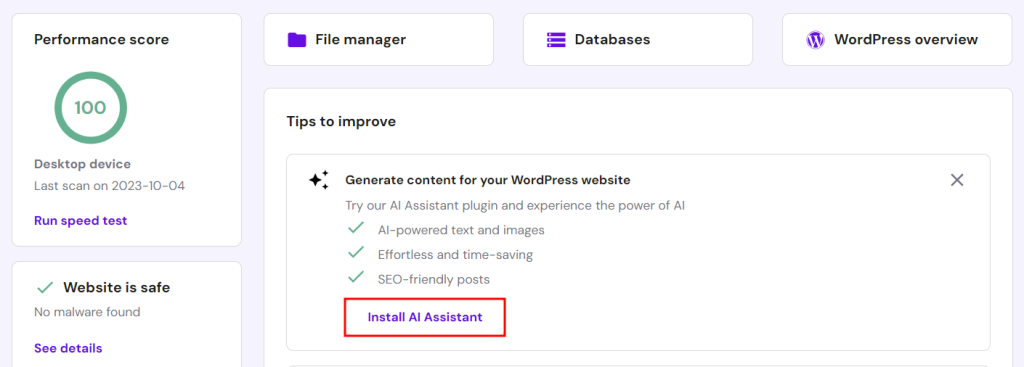
- Scroll down to the Tips to improve section and select Install AI Assistant.
- Click WordPress overview → Admin Panel to enter your WordPress dashboard. Then, head to Hostinger → AI Content Creator on the left sidebar.
- Configure the following settings to personalize your AI-created content:
- Content type ‒ choose between creating a WordPress post or a web page.
- Tone of voice ‒ decide how you want readers to perceive the content (neutral, friendly, formal, trustworthy, or witty).
- Content length ‒ determine the content’s length.
- Describe your content idea and add relevant keywords for SEO. Click Create content once you’re ready.
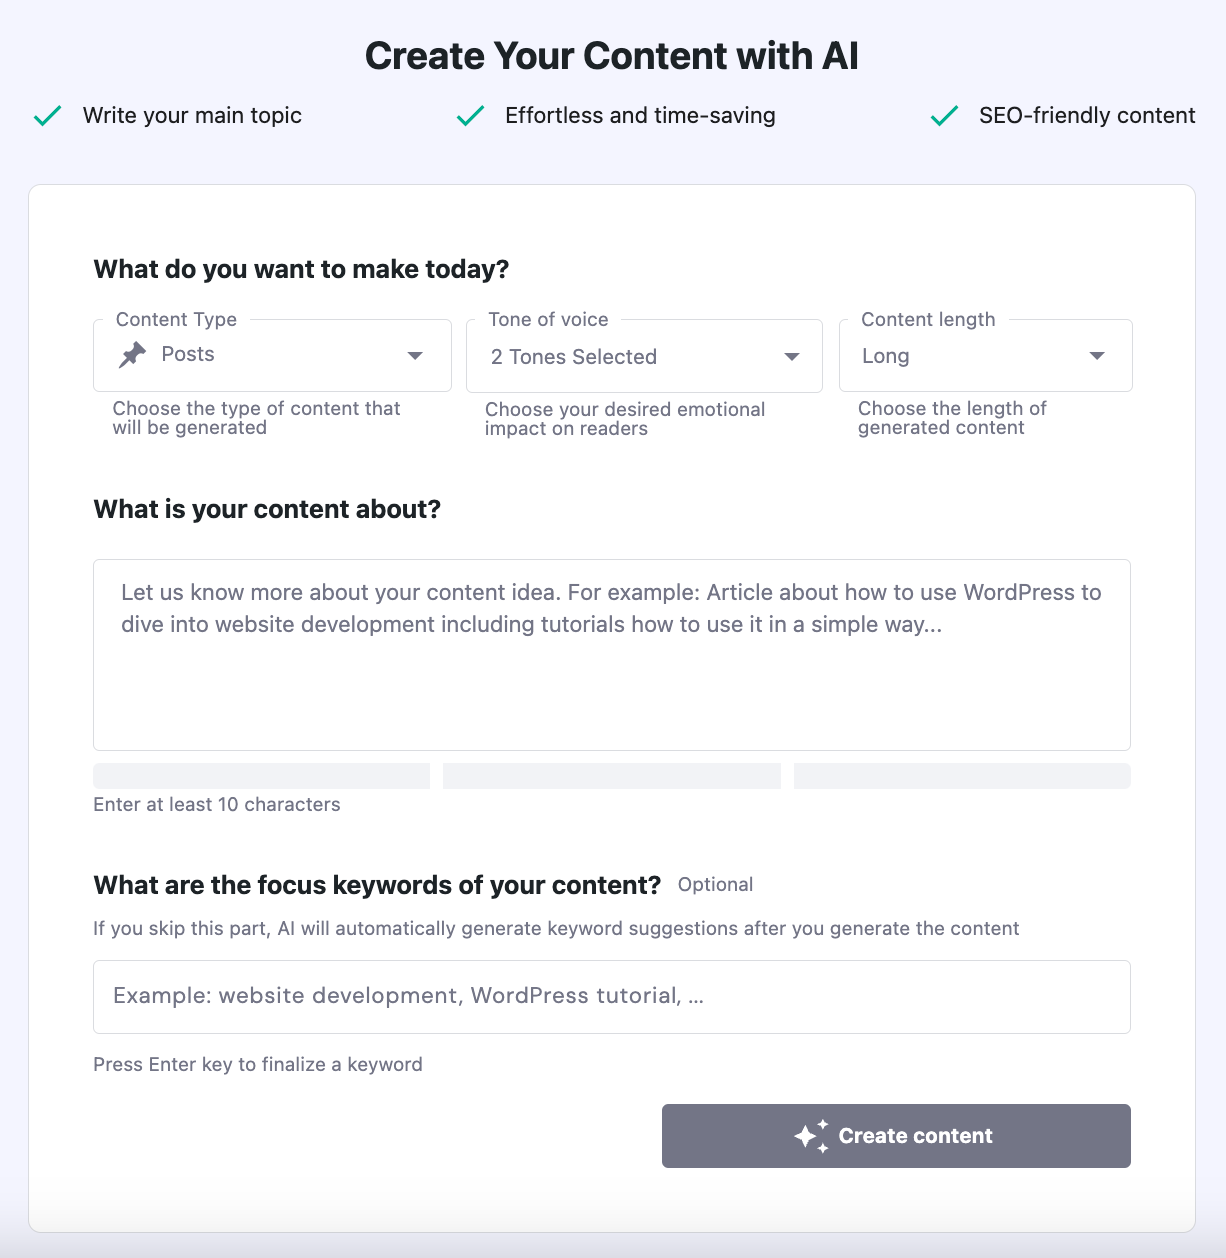
- AI Content Creator will produce the content, relevant keyword suggestions, a meta description, and an image as the featured image or part of the content. Select Publish to push the content live as it is or Edit as a draft to review it on the block editor.
For non-Hostinger users, check out our list of the best AI content generators like Jasper, GrowthBar, and Rytr to speed up your writing process.
3. Generate images and site logo
According to web design statistics, 40% of visitors favor images over other types of visual elements on business websites. Web designs and brand logos contribute to shaping first impressions and boosting conversions, making them crucial for a successful online presence.
When you can’t afford to hire a graphic designer, AI image and logo generators offer a cost-effective way to make your brand stand out. With machine learning technology, they produce unique designs inspired by various existing visual styles in seconds.
Hostinger users will get a free credit for using our AI Logo Maker. If you run out of credits, you can buy 50 more for $5.
Follow these steps to create a logo on Hostinger:
- Go to the Hostinger AI Logo Maker homepage and select Create Your Logo Now.

- Log in to your Hostinger account.
- Open the Create with AI tab, then briefly describe your brand and pick the desired style. Hit Create once you’re ready.

- After the tool has finished generating multiple options, hover over the one you like most and click Edit logo.
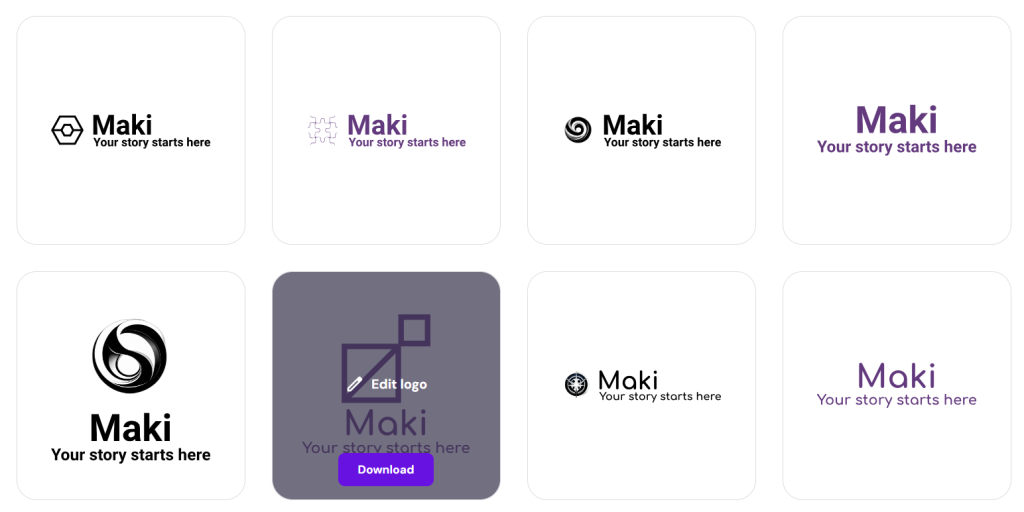
- Adjust the spacing, icon size, slogan, and font style as needed. Once you’re happy with how the logo looks, hit Download to save the file.

Alternatively, see our guide on creating website visuals with DALL-E, an OpenAI tool that generates images from text descriptions.
4. Improve search engine optimization
Besides helping with content production, AI can improve your SEO by automating and streamlining key tasks like keyword research and content optimization. You can even use AI tools to analyze your competitors’ SEO strategies and enhance technical SEO by monitoring page speed.
As SEO is an ongoing process, AI can save time and money by analyzing large amounts of data and identifying trends to help you make sound decisions. It’s especially helpful for WordPress website owners who are new to SEO and don’t have the budget to commission an expert.
Here are some of the best AI SEO tools we tested:
- Rank Math SEO ‒ best for on-page keyword optimization and website performance analysis.
- AIOSEO ‒ a popular WordPress plugin that can produce SEO titles, meta descriptions, and XML sitemaps to help search engine crawlers understand your website content better.
- MarketBrew ‒ forecasts pages’ search engine ranking before publishing based on Google Analytics data, keywords, and organic traffic trends.
- KeywordInsights ‒ compiles keyword ideas tailored to the chosen location and language for easier content planning.
Most AI SEO tools support integration with WordPress’ block editor. For example, Rank Math SEO analyzes your content as you write, offering suggestions to enhance its SEO and readability.
5. Troubleshoot WordPress issues
For non-technical users, AI can help identify issues within their WordPress site and recommend solutions quickly. AI tools check error logs, track website performance, and spot unusual activities that could signal problems, such as plugin conflicts and security risks.
Automating these checks with AI reduces downtime and speeds up troubleshooting, allowing you to save on developer fees while ensuring a consistent user experience.
Hostinger offers WordPress AI Troubleshooter to users on WordPress web hosting and other more advanced plans. This in-house AI feature catches errors like 403, 404, 500, 503, as well as the “There has been a critical error on your website” message, and helps you resolve them.
Other excellent AI-powered WordPress plugins for troubleshooting include Screaming Frog SEO Spider and Plugin Detective. The former crawls websites for broken links, duplicate content, and incorrect redirects, while the latter identifies and troubleshoots plugin-related issues efficiently.
6. Generate custom codes and check code quality
As coding requires precise attention to detail, AI tools can improve developers’ efficiency and work quality. Many AI-powered developer tools can generate custom codes based on specific project requirements, improve code quality, and even catch and fix errors.
You can consult your WordPress codes with AI chatbots like ChatGPT and Gemini. For specific tasks like troubleshooting and code analysis, check out these AI tools to boost productivity:
- CodeWP ‒ generates PHP, JavaScript, WooCommerce, and WordPress code snippets from simple prompts.
- Snyk ‒ analyzes codes for security vulnerabilities and license compliance issues.
- Figstack ‒ translates code functions into various human and programming languages.
- Mutable.ai ‒ automates documentation updates and forecasts potential errors to improve testing efficiency.
These AI tools often use chatbots to communicate with website visitors. For example, with CodeWP, simply pick the mode and preset as the base parameters, then describe the purpose of the code you want to generate. The process takes seconds to complete.
7. Protect your website from spam
Websites with comment or review sections, contact forms, and message boards are prone to spam comments. If left unchecked, they can hurt your website’s reputation and user experience.
AI-powered spam checker plugins can save time on manual moderation. Using machine learning algorithms, they spot spam signs, like unusual phrasing and specific keywords, and adapt to new spam techniques to improve accuracy over time.
Consider using AI plugins for spam protection, such as:
- Akismet ‒ built by WordPress developers, this popular WordPress plugin has one of the largest spam databases in the industry for maximum accuracy.
- Antispam Bee ‒ a free WordPress plugin that lets you block spam comments by country and language.
- CleanTalk ‒ filters spam comments, registrations, polls, and orders for WordPress and WooCommerce websites.
AI anti-spam plugins usually have an easy setup process with customizable settings to flag or automatically delete spam content. Some tools provide detailed reports and statistics on blocked comments and users, helping website administrators track potential spam activities more efficiently.
Akismet, for example, highlights the number of flagged spam messages in the dashboard widget for easier access. See our guide on setting up Akismet for anti-spam protection.
8. Translate your website
Making your WordPress website multilingual is another effective method when improving SEO and user experience. If language barriers keep you from expanding your audience reach, AI can help with that, too.
Various AI translation plugins are ready to translate your WordPress site content into different languages in real time. They use machine learning algorithms to ensure the content’s context and tone aren’t lost in translation, making it accessible to an international audience.
TranslatePress, for example, uses AI to automate slug, gettext, and email translation. It can also generate translations for different user roles, which is one of its premium features.
Check out these top AI-powered WordPress plugins for translation:
- Weglot ‒ supports over 100 languages with an intuitive visual translation editor for previewing the website’s front-end.
- TranslatePress ‒ allows you to translate directly from the front-end and make separate translations for logged-in and visiting users.
- GTranslate ‒ supports URL translation and search engine indexing for translated pages.
- Translate WordPress ‒ developed by GTranslate developers, it can localize images and support language hosting for better local search rankings.
9. Optimize images and improve accessibility
Websites with many visuals can lose potential visitors if the images aren’t optimized and accessible. Furthermore, unoptimized images tend to load slowly, affecting your user experience and SEO
Image compression tools incorporate AI to automate the process without compromising quality. Certain WordPress AI plugins can add alt texts, adjust color contrast, and improve the brightness of images for users with visual impairments and screen reader reliance.

Here are some of the best WordPress AI plugins to optimize images:
- Smush ‒ helps with WordPress image optimization aspects like resizing, lossless and lossy compression, and automatic WebP conversion.
- Alt Text AI ‒ automatically adds alt texts for images in various languages and enables custom ChatGPT prompts to modify the produced text.
- ShortPixel ‒ allows background processing for faster bulk image optimization, which is useful for WordPress sites with an extensive media library.
- Optimole ‒ offers machine learning-powered automatic compression based on visitors’ devices.
10. Enable chatbots
For better customer support, use AI to add chatbots to your WordPress site. AI-powered chatbots can increase user engagement by offering personalized experiences. They can handle multiple conversations at once, freeing up human agents to deal with more complex issues.
From the business side, AI chatbots can help capture potential leads and provide valuable data for market research. You can scale your customer support team to offer 24/7 service without hiring more staff or increasing operational costs.
Check out these top AI chatbot tools to improve customer relationships:
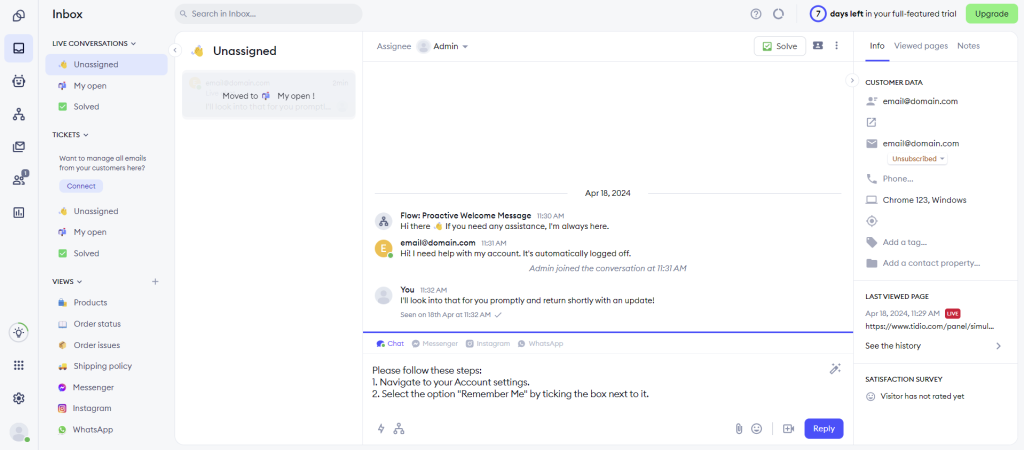
- Tidio ‒ can formulate complex answers from FAQs and knowledge base resources to solve customers’ problems.
- Zendesk ‒ offers self-help options by suggesting relevant articles through various channels.
- Chatsonic ‒ comes with an AI content creator, translation capabilities, and voice command support.
- LivePerson ‒ builds custom AI-powered chatbots that integrate with back-end systems like scheduling tools and payment processing.
11. Add a voice search to your site
As more users turn to voice commands for internet searches, optimizing your WordPress website for voice search can increase its ranking for conversational queries. With NLP, AI tools analyze how users phrase questions verbally to optimize website content with relevant long-tail keywords.
For local voice searches, AI uses geographic data and user behavior to improve location-based queries. As a result, you have a better chance of ranking for local searches.
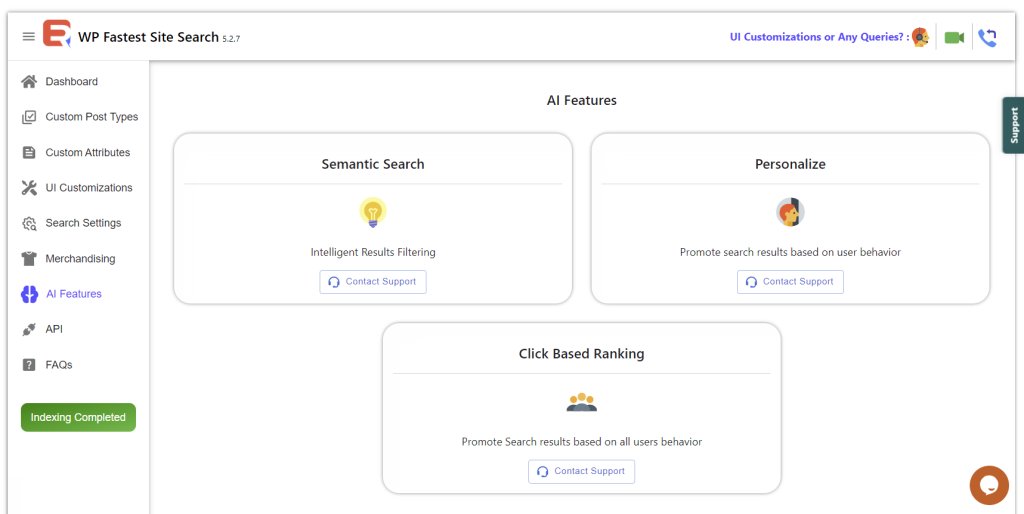
WP Fastest Site Search is one of the best WordPress plugins for voice search optimization. It offers AI-powered features to accommodate personalized search with smart semantic filtering.
After creating an account, configure the WordPress AI plugin’s indexing process and search settings. You can even set up search redirects and synonyms to improve user experience.

What is DeepSeek AI?
DeepSeek is an artificial intelligence lab founded in May 2023, specializing in open-source large language models that help computers understand and generate human language.Liang Wenfeng is recognized for his work in AI development and financial investment, with a background in computer science and finance. Before establishing DeepSeek, he focused on building expertise in these fields. His role at High-Flyer has provided the financial backing necessary to drive technological innovation at DeepSeek.
DeepSeek’s R1 Shakes Up the U.S. Stock Market
DeepSeek, a Chinese AI lab, has caused a stir in the U.S. stock market with its new chatbot, R1. Launched on January 20, R1 quickly gained traction, leading to a drop in Nasdaq 100 futures as Silicon Valley took notice.
Over the weekend, DeepSeek climbed to the top of the Apple App Store, and R1 entered the top 10 on UC Berkeley’s Chatbot Arena leaderboard. This swift rise has raised investor concerns about the cost-effectiveness of DeepSeek’s model.
DeepSeek spent just $5.6 million to train R1, excluding R&D costs. In contrast, U.S. companies like OpenAI and Oracle are investing heavily in the Stargate AI initiative. This cost disparity has sparked what Kathleen Brooks, research director at XTB, calls an “existential crisis” for U.S. AI dominance. The affordability of DeepSeek’s model has led to worries about chip makers’ valuations, with Nvidia, Broadcom, and AMD stocks all experiencing declines in premarket trading.
R1’s success also challenges Big Tech firms investing in AI. Microsoft and Alphabet shares fell ahead of the market opening. The “DeepSeek dip” affected the broader market, with Nasdaq 100 contracts and S&P 500 futures both dropping. As DeepSeek develops AI, companies are rethinking their strategies and investments.
DeepSeeks Path Since Launch in May 2023
DeepSeek has rapidly become a key player in the AI industry by overcoming significant challenges, such as US export controls on advanced GPUs. These constraints have pushed the company to innovate, focusing on efficiency and collaboration.
By optimizing memory usage and employing a chain-of-thought approach, DeepSeek’s models can handle complex tasks like advanced mathematics and coding without overloading less powerful GPUs.
To advance its development, DeepSeek has strategically used a mix of capped-speed GPUs designed for the Chinese market and a substantial reserve of Nvidia A100 chips acquired before recent sanctions. Reports indicate the company possesses at least 10,000 A100 units, with some estimates suggesting up to 50,000. This resourcefulness has allowed DeepSeek to continue pushing the boundaries of AI technology.
DeepSeek R1 vs. ChatGPT o1
DeepSeek’s large language model, R1, has been introduced as a formidable competitor to OpenAI’s ChatGPT o1. The company claims that R1 can rival ChatGPT o1 in several benchmarks while operating at a significantly lower cost. This development is seen as a potential breakthrough for researchers and developers with limited resources, particularly in the Global South, as noted by Hancheng Cao, an assistant professor at Emory University.
What Makes the R1 Different From o1
While DeepSeek and OpenAI’s models look quite similar, there are some tweaks that set them apart.
- Cost Efficiency: R1 operates at a fraction of the cost, making it accessible for researchers with limited budgets.
- Engineering Simplicity: R1 focuses on delivering accurate answers with minimal computational demands, as highlighted by Dimitris Papailiopoulos from Microsoft’s AI Frontiers lab.
- Open Source Accessibility: DeepSeek has released six smaller versions of R1, some capable of running on standard laptops, aligning with the trend of open-source releases in China.
These features collectively position R1 as a cost-effective and efficient alternative to ChatGPT o1, offering a new option for those seeking advanced AI capabilities without the associated high costs. As DeepSeek continues to innovate, its achievements demonstrate how hardware constraints can drive creative engineering, potentially reshaping the global LLM landscape.
Frequently Asked Questions
Here are the most asked questions about DeepSeek AI
What is DeepSeek?
DeepSeek is a Chinese AI startup founded by Liang Wenfeng, known for its innovative approach to artificial intelligence. The company focuses on developing efficient and accessible AI solutions, including large language models like R1, to make advanced technology available to a broader audience.
How does DeepSeek’s R1 compare to OpenAI’s ChatGPT o1?
DeepSeek’s R1 is designed to rival OpenAI’s ChatGPT o1 in several benchmarks while operating at a significantly lower cost. Key features include cost efficiency, engineering simplicity, and open-source accessibility, making R1 a formidable competitor in the AI landscape.
What technological innovations has DeepSeek introduced?
DeepSeek has pioneered several advancements, particularly in AI model training and efficiency. By employing a chain-of-thought approach and optimizing memory usage, DeepSeek’s models can handle complex tasks without overloading less powerful GPUs, setting new benchmarks in AI development.
How has DeepSeek managed to navigate geopolitical challenges?
DeepSeek has adapted its strategies to overcome challenges posed by US export controls on advanced GPUs. By utilizing capped-speed GPUs and a substantial reserve of Nvidia A100 chips, the company continues to innovate despite hardware limitations, turning constraints into opportunities for creative engineering.
What impact has DeepSeek had on the Global South?
DeepSeek’s affordable AI solutions are particularly beneficial for researchers and developers in the Global South. By providing access to state-of-the-art technology at lower costs, DeepSeek empowers these communities to leverage advanced AI capabilities for various applications.

How to Convert Figma to WooCommerce in 7 Easy Steps: Ultimate Checklist
Switching from Figma to WooCommerce can be a lucrative move for online stores. WooCommerce, a powerful and customizable WordPress plugin, offers a robust platform for eCommerce ventures, providing unparalleled flexibility and scalability. The Figma to WooCommerce conversion is crucial for businesses seeking a seamless transition, improved functionality, and a broader range of features.
In this blog, we’ll break down the steps for Figma to WooCommerce conversion. We will also help you assess and prepare for the conversion. So, let’s begin this straightforward guide to boost your online shop’s performance!
Overview of Figma and WooCommerce
Figma is a collaborative design platform widely used to create user interfaces and prototypes. It facilitates seamless collaboration among designers and teams in a cloud-based environment, streamlining the design process.

WooCommerce, on the other hand, is a powerful WordPress eCommerce plugin. It transforms a WordPress site into a feature-rich online store, offering tools for product management, secure transactions, and an array of customization options.
Assessing the need to move from Figma to WooCommerce involves thoroughly examining your business goals, technical requirements, and each platform’s capabilities. Here’s a detailed exploration of key factors to consider:
- eCommerce Expansion: Figma is primarily a design tool and lacks eCommerce functionality. If your business expands into online sales or already operates an eCommerce store, moving to WooCommerce becomes imperative for a comprehensive and integrated solution.
- Economic Viability: WooCommerce is a cost-effective solution as it operates within the WordPress ecosystem. This often minimizes the expenses compared to standalone eCommerce platforms. So, when deciding to switch from Figma to WooCommerce, evaluate your budget and consider the long-term cost implications for your business.
- WordPress Integration: If your website is already on WordPress, integrating WooCommerce seamlessly aligns with your existing infrastructure. The synergy between WordPress and WooCommerce ensures a smoother transition without any major overhauls.
- Customization and Flexibility: WooCommerce provides extensive customization options and a range of premium & free plugins to enhance functionality. If your business requires specific features or a unique design, WooCommerce’s flexibility allows for tailored solutions to meet your needs.
- User Experience: Figma primarily focuses on design, while WooCommerce is purpose-built for eCommerce. Assess your website’s user experience and transactional capabilities, considering whether the migration will contribute to a more seamless and user-friendly shopping experience.
- Scalability: Consider the scalability of your online store. If you anticipate significant product growth, traffic, or transactions, WooCommerce’s scalability ensures that your eCommerce platform can grow with your business without major disruptions.
- Collaboration vs Transaction: Figma serves its purpose well if your primary focus is collaborative design and team interaction. However, if your business revolves around transactions and online sales, WooCommerce provides the necessary tools
- Preparing for the Figma and WooCommerce Conversion
- Here’s a detailed guide on how to prepare for the Figma to WooCommerce conversion:
- Backup Your Data
- Before initiating any conversion process, create a comprehensive backup of your Figma design files and any other relevant data. This ensures that you have a safety net in case of unexpected issues during conversion.
Inventory and Review
Take stock of your current Figma designs and assess the scope of the migration. Identify essential design elements, assets, and specific features that must be translated to WooCommerce. This inventory will guide you in prioritizing data during conversion.
Understand WooCommerce Requirements
Familiarize yourself with WooCommerce’s technical and design requirements. Ensure that your Figma designs align with WooCommerce’s capabilities and standards. This understanding will help you anticipate potential challenges and plan accordingly.
Evaluate Design Consistency
Review your Figma designs to ensure the consistency of layout, typography, and visual elements. This is important as consistent design elements facilitate a smoother transition and help maintain a cohesive look and feel on the WooCommerce platform.
Content and Product Mapping
Map your Figma content and products to the corresponding structures in WooCommerce. Create a mapping document that outlines how each element in Figma translates to the WooCommerce environment. This mapping is crucial for accurate data migration.
Check Third-Party Integrations
If your Figma designs involve third-party integrations or plugins, assess their compatibility with WooCommerce and ensure that similar or alternative solutions are available to maintain the desired functionality.
Prepare for Downtime
Anticipate a brief period of downtime during the conversion process. Communicate with your team and customers about the scheduled downtime to minimize disruptions. If possible, plan the conversion during periods of lower website traffic.
SEO Considerations
Evaluate the impact of the conversion on your website’s SEO. Redirects and proper handling of URLs are crucial to maintain search engine rankings. Implement a strategy to minimize any negative effects on SEO during and after the conversion.
Testing Environment
Set up a testing environment (or staging environment) to simulate the conversion process. This allows you to identify and resolve any issues before implementing the changes on your live website. Test the functionality, design, and user experience thoroughly.
Communicate with Stakeholders
Keep all stakeholders informed about the conversion plan. This includes your design team, WordPress developers, and any other parties involved. Clear communication ensures that everyone is on the same page and can address potential challenges
Figma to HTML: Convert designs to clean HTML code in a click
The journey from a visual design in Figma to a fully coded website can often be a complex and time-consuming process. Traditionally, developers have spent a significant amount of time carefully translating Figma design files into HTML code. This step is crucial in bringing any web design to life.
However, this translation process not only affects project timelines but also takes away resources from more important tasks, such as optimizing site performance, refining user experience, and enhancing functionality.
While HTML conversion tools have existed for years, they often fall short of delivering production-ready code.
Now, with AI technology becoming more advanced, it’s time to leverage it as part of the solution to this challenge. At Builder.io, we’ve done just that with Visual Copilot.
In this blog post, we will explore how converting Figma designs to HTML code using our AI tool can save hours of manual work, streamline the workflow for front-end developers, and aid in building web applications with ease.
What is Figma?
Figma is a collaborative interface design tool with an emphasis on real-time collaboration. It’s known for its user-friendly interface and strong design capabilities, making it a favourite among designers. Figma components and design files form the basis for creating pixel-perfect designs and prototypes which are crucial for a seamless handoff to developers.
Visual Copilot: AI-powered plugin to convert Figma to HTML
Traditionally, asking a developer if they could export Figma to HTML might have earned you a tired sigh — it’s a bit like asking Michelangelo if he could just ‘print’ the Sistine Chapel ceiling. But what if the answer could be as simple as, “Why not do it in one click?”.
At Builder.io, we’ve created Visual Copilot — an AI-powered Figma to code toolchain that leverages AI to swiftly and accurately convert Figma designs to clean and responsive HTML code.
One-click conversion
Visual Copilot not only converts your Figma design into HTML but also generates the associated CSS code, ensuring that the stylistic elements of your design are preserved. This accelerates the development cycle dramatically, bridging the gap between design and deployment.
Automatic responsiveness
The tool ensures that the responsive elements are automatically adjusted for all screen sizes, generating truly responsive HTML without additional manual intervention. Save hours of writing media queries for different screen sizes.
Extensive framework and library support
Visual Copilot is designed to be versatile, supporting a broad range of frameworks and libraries beyond HTML and CSS, such as React, Vue, Angular, and Tailwind CSS, ensuring the generated HTML code integrates seamlessly with your project.
Customizable code
Post-conversion, the HTML code generated is fully customizable, allowing for consistent coding practices and the integration of specific functionalities as required, all while ensuring the output is not only clean code but also maintainable code.
Easy integration with your codebase
Integrating Visual Copilot’s output into your workflow is as straightforward as copying and pasting the code. For an even smoother process, there’s the option to sync the generated HTML directly with your app codebase.
How Visual Copilot uses AI to output clean HTML code
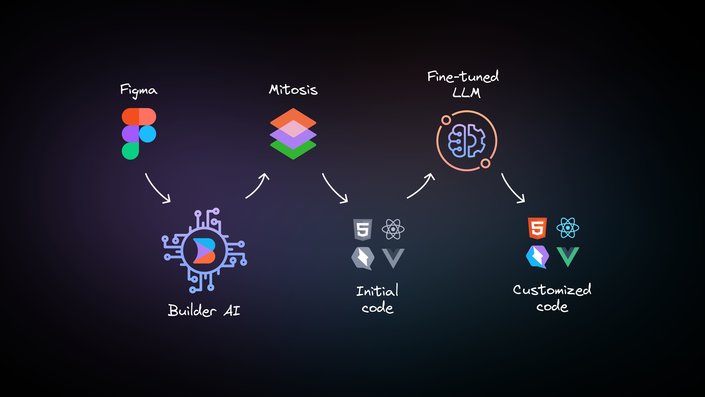
Visual Copilot’s core is powered by AI models and a specialized compiler. The AI is trained to recognize and translate design patterns into code (even without auto layout), while the compiler, Mitosis, takes the structured design information and converts it into clean HTML code. A Large Language Model (LLM) polishes the final output, ensuring it aligns with your specific styling and structural preferences.
The power of design, code, and business context
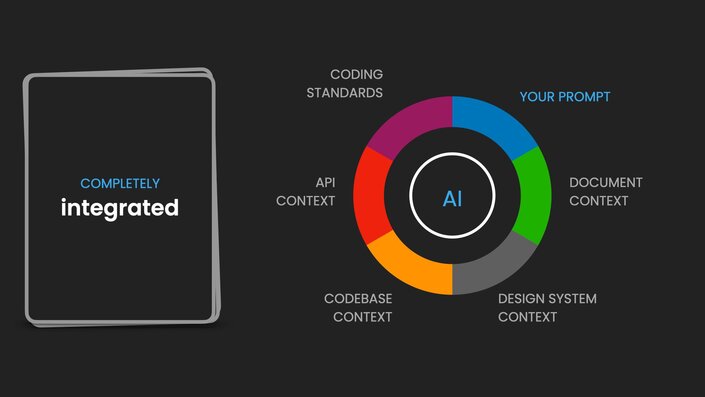
Unlike other AI tools that generate isolated components or demos, Visual Copilot is deeply integrated with your entire product:
- Your design context: It understands your Figma components, design tokens, and documentation
- Your code context: It knows your code components, coding standards, and development patterns
- Your business context: It connects to your APIs, data models, and business logic
This means describing complex features in just a few words gets you exactly what your team would build – using your design system, following your standards, connected to your services.
Convert Figma designs to HTML code in a few steps
Getting started with Visual Copilot is straightforward:
- Open the Visual Copilot figma plugin.
- Select a layer or design in your Figma file.
- Click the Generate code button.
- Copy the generated HTML into your project.
- Customize the code to support animations, custom fonts, svgs, or other required functionality with JavaScript.
Create a landing page in 50 seconds: Figma to HTML + CSS
With the ability to handle a variety of web pages, Visual Copilot makes it easier to maintain a consistent look and feel across your entire site. This tutorial guides you in transforming a Figma design into a landing page in merely 50 seconds with Visual Copilot – responsive design without any manual conversion.
Conclusion
Visual Copilot is a design and developer-friendly AI tool that significantly accelerates the process of converting Figma designs to code. It fosters a collaborative environment, ensures a seamless transition from design to code, and promotes an efficient web development workflow.

WordPress SEO Services and Website Search Engine Marketing
For 12 years we’ve been SEO experts focused on WordPress SEO services that drive higher search engine rankings, website traffic, and online sales. At OuterBox, we have an expert WordPress SEO and WordPress web design team under one roof. We know all the “insides and outs” of WordPress and develop a search marketing plan tailored to your business growth goals. Get a free estimate today.
We have a full in-house SEO and WordPress development team. That’s why we’re an industry-leading WordPress SEO company.
WordPress SEO services are search marketing-focused services that help improve the search engine optimization (SEO) of a website built with the WordPress platform. These services may include keyword research, on-page optimization, technical SEO / code optimization, off-site optimization, and much more. The goal is to improve the visibility and ranking of the WordPress website in search engine results, ultimately driving more traffic and generating more leads for the business.
WordPress SEO Services
At OuterBox we have proven SEO strategies to optimize your WordPress website. We know what’s worked for other WordPress clients and we’ll do the same for you.
Is a WordPress SEO Campaign for You?
Want to talk over your WordPress search engine optimization needs? We’ll answer any search marketing questions – just contact us about SEO services for WordPress.
How do SEO services for WordPress websites work?
WordPress SEO Audit & Analysis
If you have an established WordPress website, we’ll do a detailed SEO audit to determine what changes, additions, and modifications need to be made to boost your rankings and visibility in the search engines. We’ll identify long-handing fruit (easy-to-fix items) based on your current keyword positions and what will make the biggest ranking impact in the shortest amount of time. We’ve worked on hundreds of WordPress sites, so we know what needs to happen to boost your search engine positions.
Develop a Custom WordPress SEO Strategy
After we’ve analyzed the website, we’ll develop a custom WordPress SEO strategy. This strategy will be focused on your goals and based on your industry, competition, and current positions. No campaigns are the same and at OuterBox we tailor the overall strategy to your needs.
Technical Updates & On-Site Optimization
With a full in-house team of WordPress developers, we can easily make technical updates that will improve rankings. From changing basics such as title tags, header tags, and ALT tags, to coding pages to focus on featured Google results, our team can handle any development task. We’ll be sure to improve your site’s internal linking structure, set up your SSL certificate (if needed), and get your on-site SEO in great shape.
Ongoing Content Creation, Blog Posts, & Articles
Creating new content regularly is an important page of an ongoing WordPress SEO campaign. Our SEO team will develop a content calendar built to rank for new keywords and also increase rankings for current keywords.
Maximizing Your Ecommerce Success
A skilled Shopify SEO company provides services that increase organic traffic to your store and generate more sales.Intelligence SEO uses research-backed conversion rate optimization (CRO) methods and technical site audits to make sure every aspect of your store — both visible to customers and behind the scenes in the source code — is positioned to boost your ranking in search engine results.
Building a web business with Shopify’s drag-and-drop interface might be simple, but standing out in today’s highly-populated e-commerce scene isn’t always easy. With online sales revenues expected to have soared from $335 billion in 2015 to over $523 billion in 2020, online visibility has become a crucial component of success.
SEO (search engine optimization) increases your business’ search visibility—allowing you to potentially attract more traffic, as well as increase conversions and sales. Our Shopify SEO services have helped countless businesses fine-tune their site and maximize their online presence, and we would love to do the same for you!
EXPERT-LED, COMPREHENSIVE APPROACH TO MAXIMIZING YOUR ONLINE SUCCESS
Unfortunately, comprehensive SEO isn’t among them. To maximize your store’s performance, you’ll need professional SEO performed by experts.To date, Coalition Technologies has helped hundreds of business owners revamp their Shopify SEO. Whatever your business niche is, we’ve got the experience and tools to deliver measurable results.
Complete Page Optimization: With our SEO services for Shopify websites, each of your Shopify web pages will attract customers who are already interested in your products and services. We’ll perform a full review of your Shopify store and optimize titles, headers, URLs, and metadata to ensure your customers can find you via leading search engines like Google and Bing.
Powerful Internal Page Linking: Once your customers have found your web store, internal page linking is an effective way to ensure they find what they’re looking for. Our Shopify SEO experts will work with you to create a compelling internal linking strategy that appeals to both customers and search engines.
Benefit from Keyword-Driven Traffic: Including relevant keywords in your web content is an invaluable way to increase SEO and generate traffic. Our team will help you target keywords in your niche and leverage them as powerful lead generators.
Build Credibility with Link Building: When high-value websites link to your Shopify web store, it increases your business’s search engine visibility — even in crowded niches. We’ll work with you to create a high-quality link-building strategy that produces tangible results and a strong ROI
Why Your Shopify Store Needs An SEO Agency
Shopify advertises that its standard hosting services have SEO “built-in.” That’s true to an extent. Your store pages include auto-generated canonical tags, sitemap.xml and robots.txt files, and sharing options for social media. But if you want to go beyond that and include optimized product descriptions, search-friendly title tags, and a high-converting page layout, a Shopify SEO agency can help.
There’s no magic or secret formula about what our company does. But if you have dozens of products, you’re looking at hundreds of hours required to optimize each page, conduct technical analyses, and view performance tracking to make ongoing recommendations. Coalition provides the best Shopify SEO services because we have the experts to dig into the data and amplify your site. You have the products. We help you find the right customers.
A Proven SEO Agency With Shopify Expertise
In an ever-changing industry, we’re fueled by innovation and a deep passion for what we do. Our meticulous work ethic translates directly to our Shopify SEO services. With a strong combined understanding of ecommerce, Shopify, and powerful SEO strategies, we leave no stone unturned for our clients.
Rainbow Symphony, a paper glasses store, chose Coalition for its Shopify SEO services with the goal of increasing site traffic and revenue. Through our SEO and PPC campaigns, we increased organic sessions by 371% and overall traffic by 282%. Monthly organic revenue by 339%, leading to a 181% increase in overall revenue.
Ecommerce is more competitive than ever, but the opportunities have never been greater. Partner with the Shopify SEO agency that has the experience, resources, and commitment to see your store grow. Our digital strategists will provide you with a free site analysis and review, outlining our next steps. When you’re ready to reach new audiences, call us. +923022631652 , furqanpanjwani@gmail.com

